Amazon AWS deployment
Here is a manual for deployment DeepPavlov (with ODQA as example) in Amazon Web Services using EC2 virtual machine.
Deployment process consists of two main stages:
AWS EC2 machine launch
DeepPavlov ODQA deployment
1. AWS EC2 machine launch
Login to your AWS console and proceed to the EC2 services dashboard.
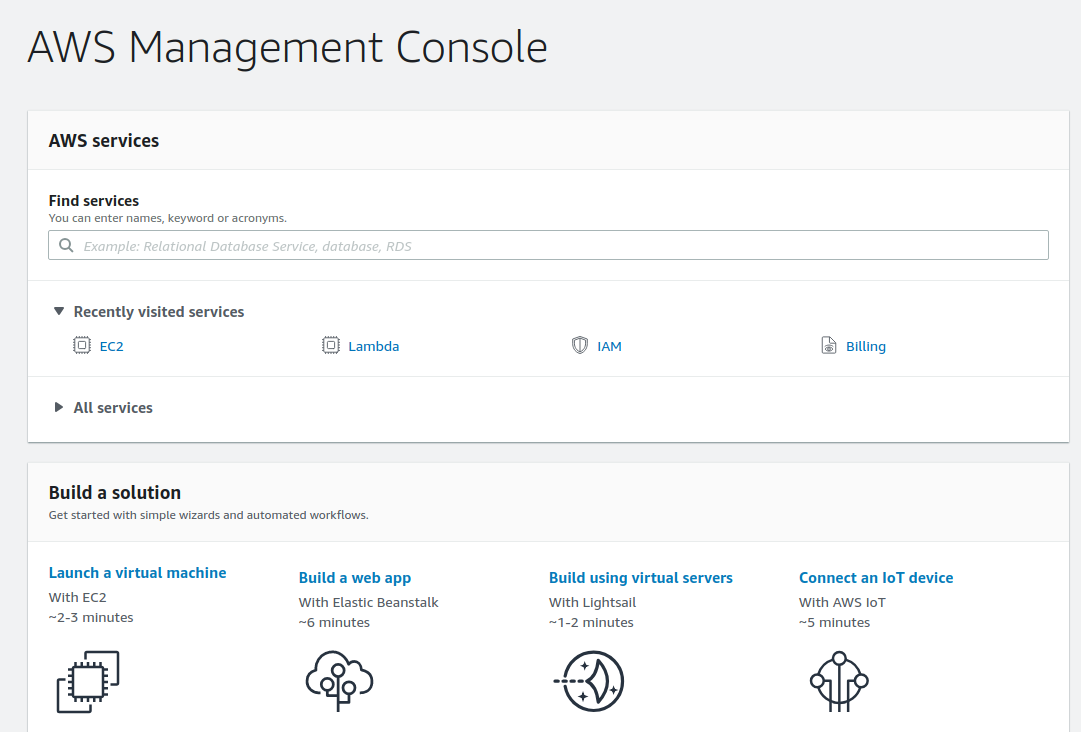
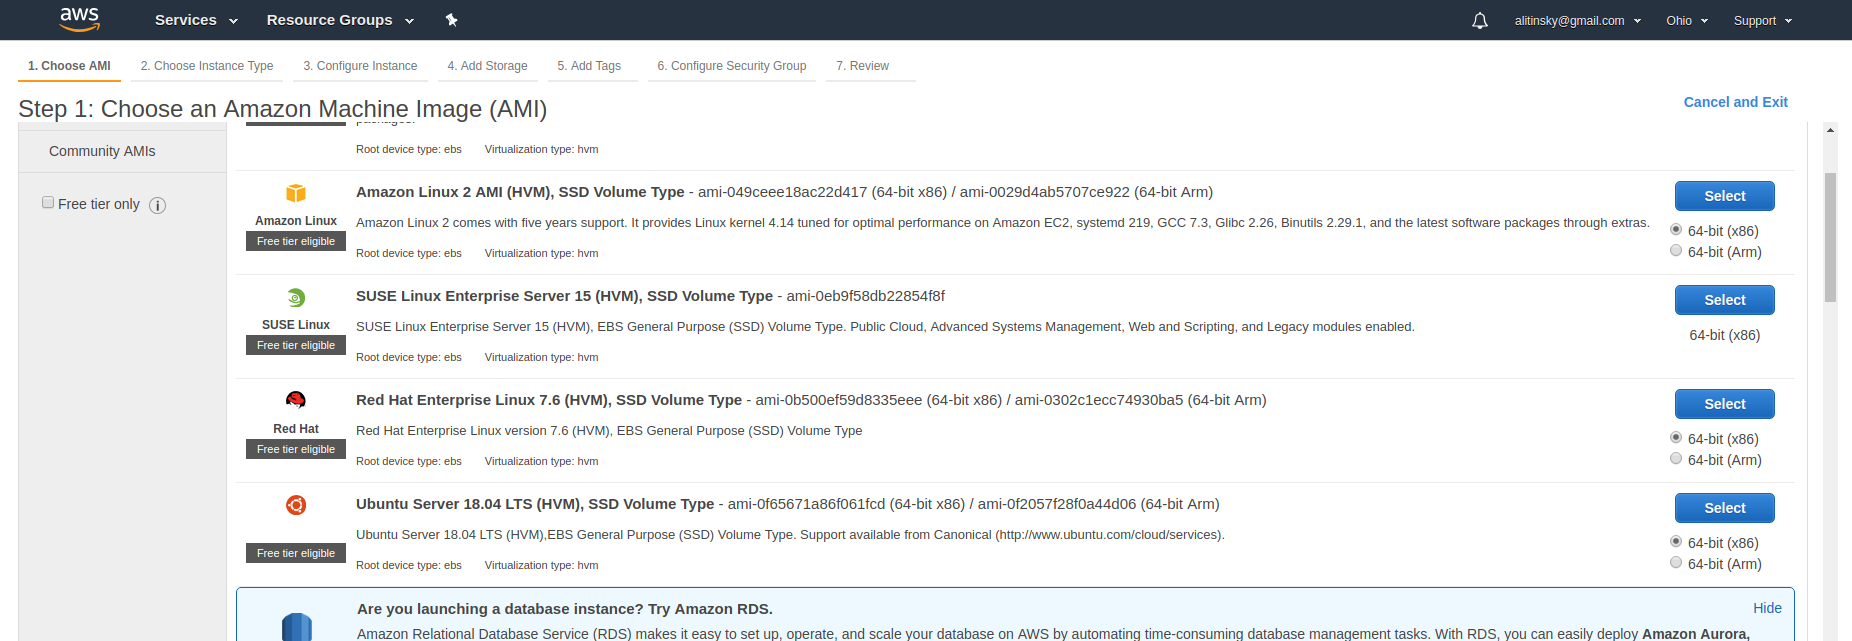
Choose Ubuntu Server 18.04 LTS 64-bit x86 machine.
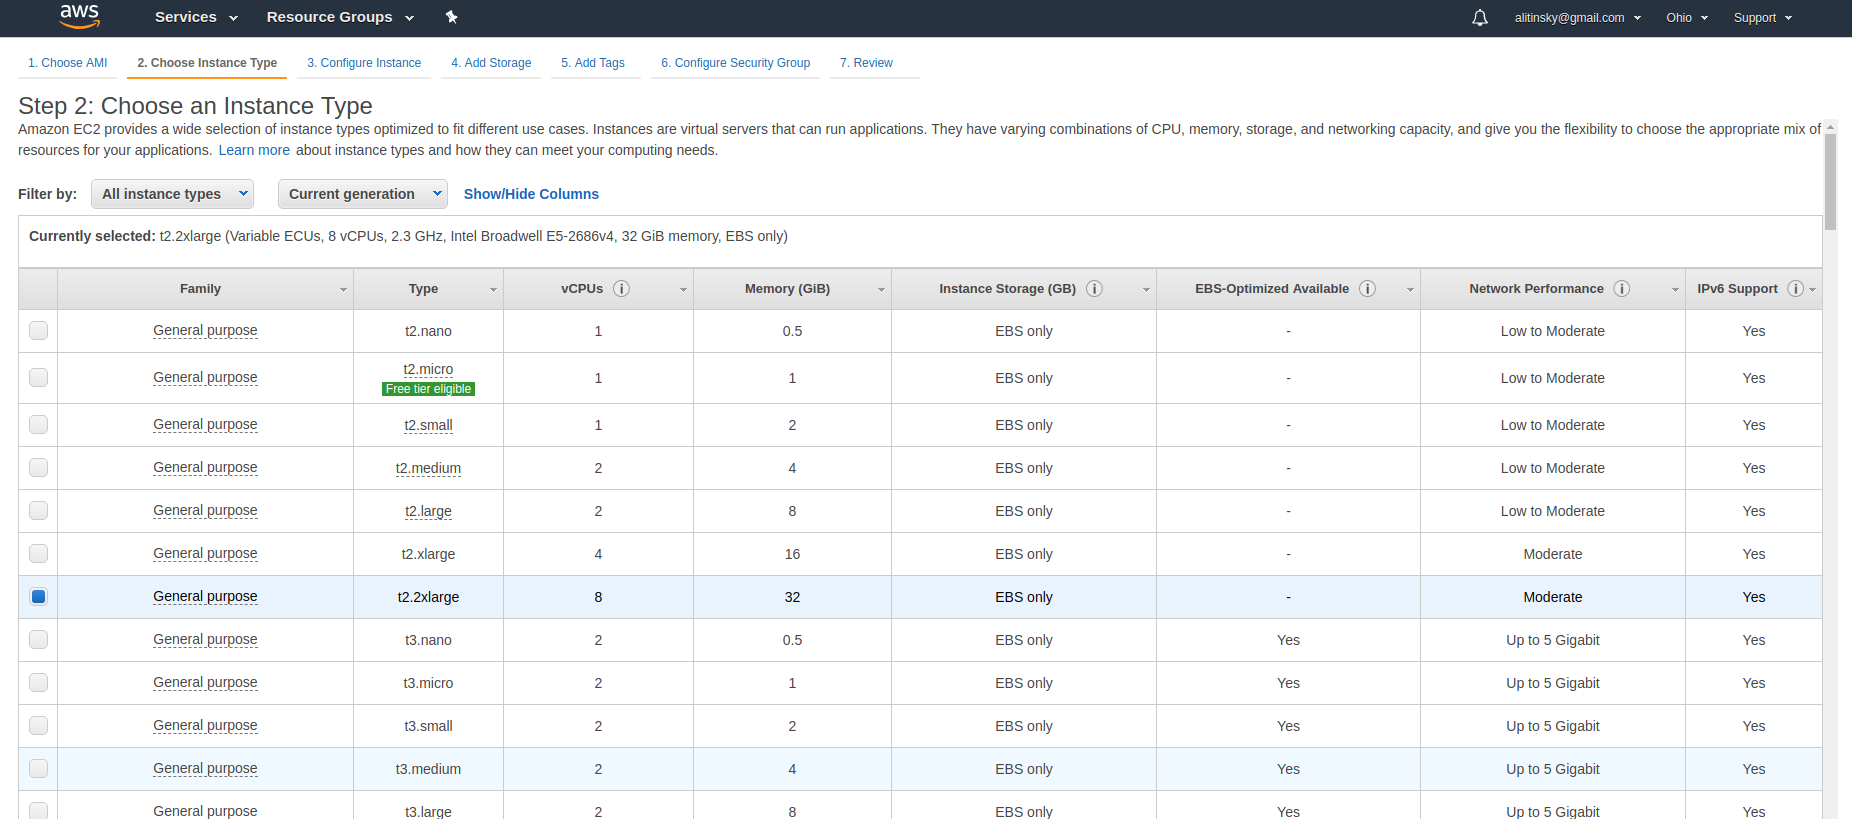
You should select appropriate instance type because of high memory consumption by ODQA. 32 GiB memory is a minimum. Then press “Next: …”
Proceed to Step 4. Your instance storage size should be no less than 50 GiB to store ODQA models.

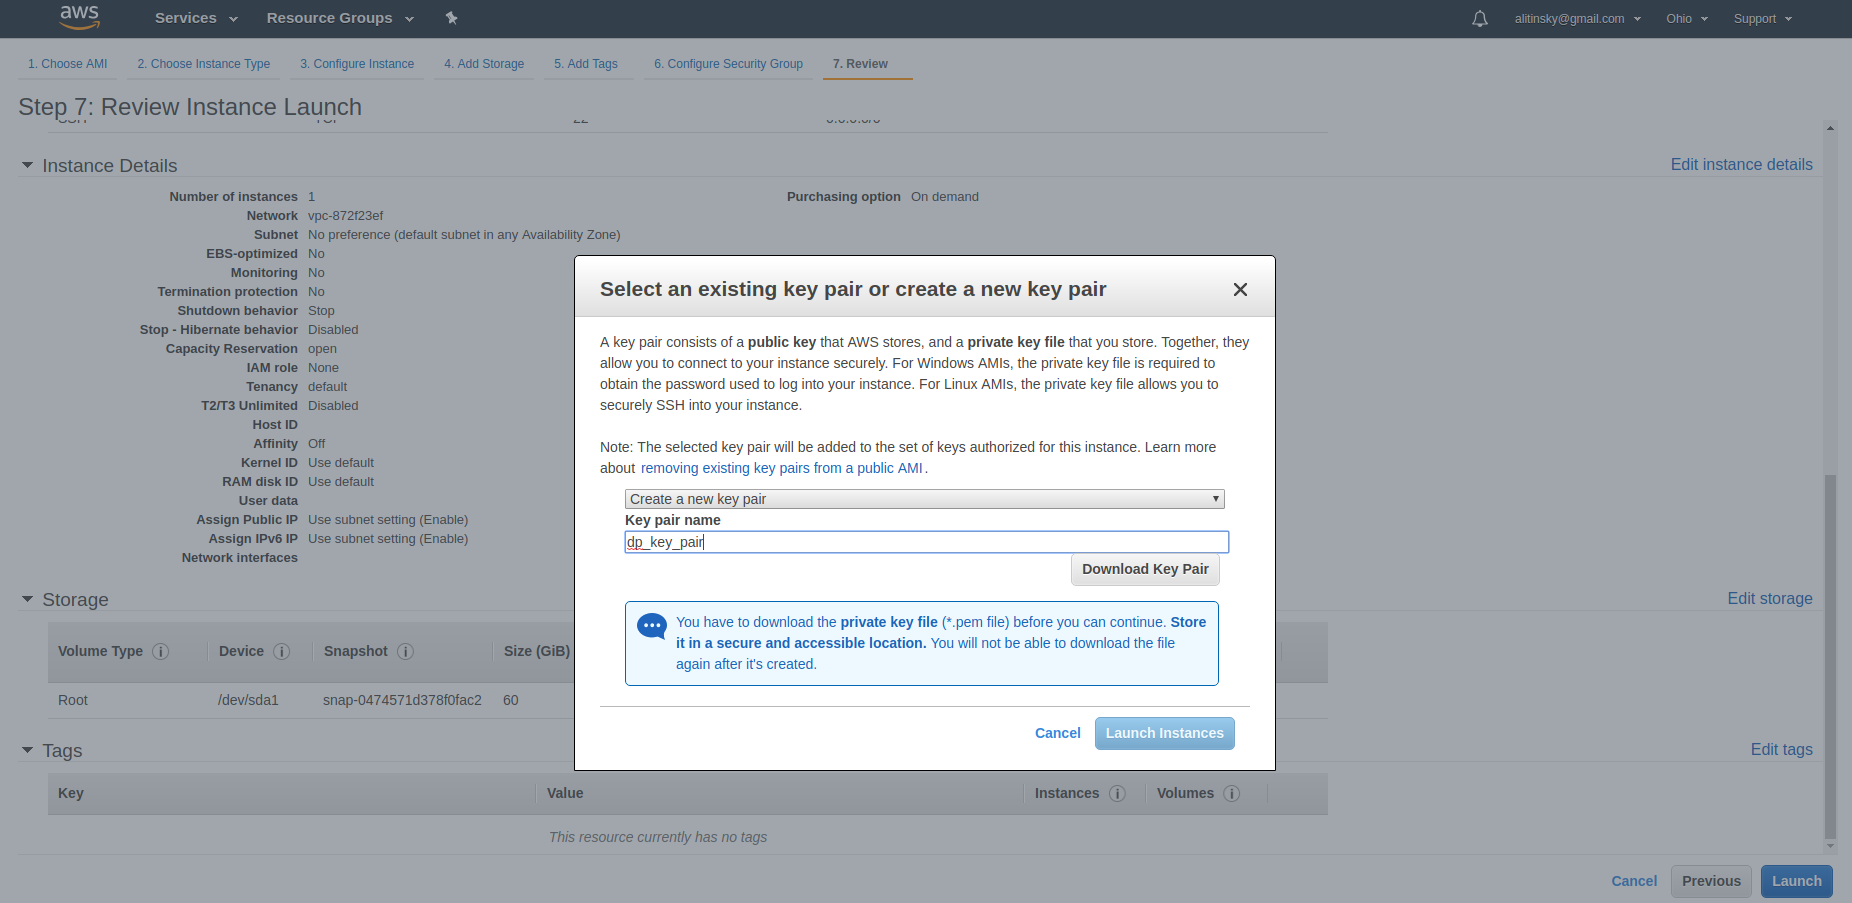
Proceed to Step 7. Check your instance parameters and press “Launch” button. You will be prompted to create and save security key pair for further access to your instance.
Return to your EC2 services dashboard and navigate to your running instances list.

Wait until instance initializing finishes (instance status become “running”).

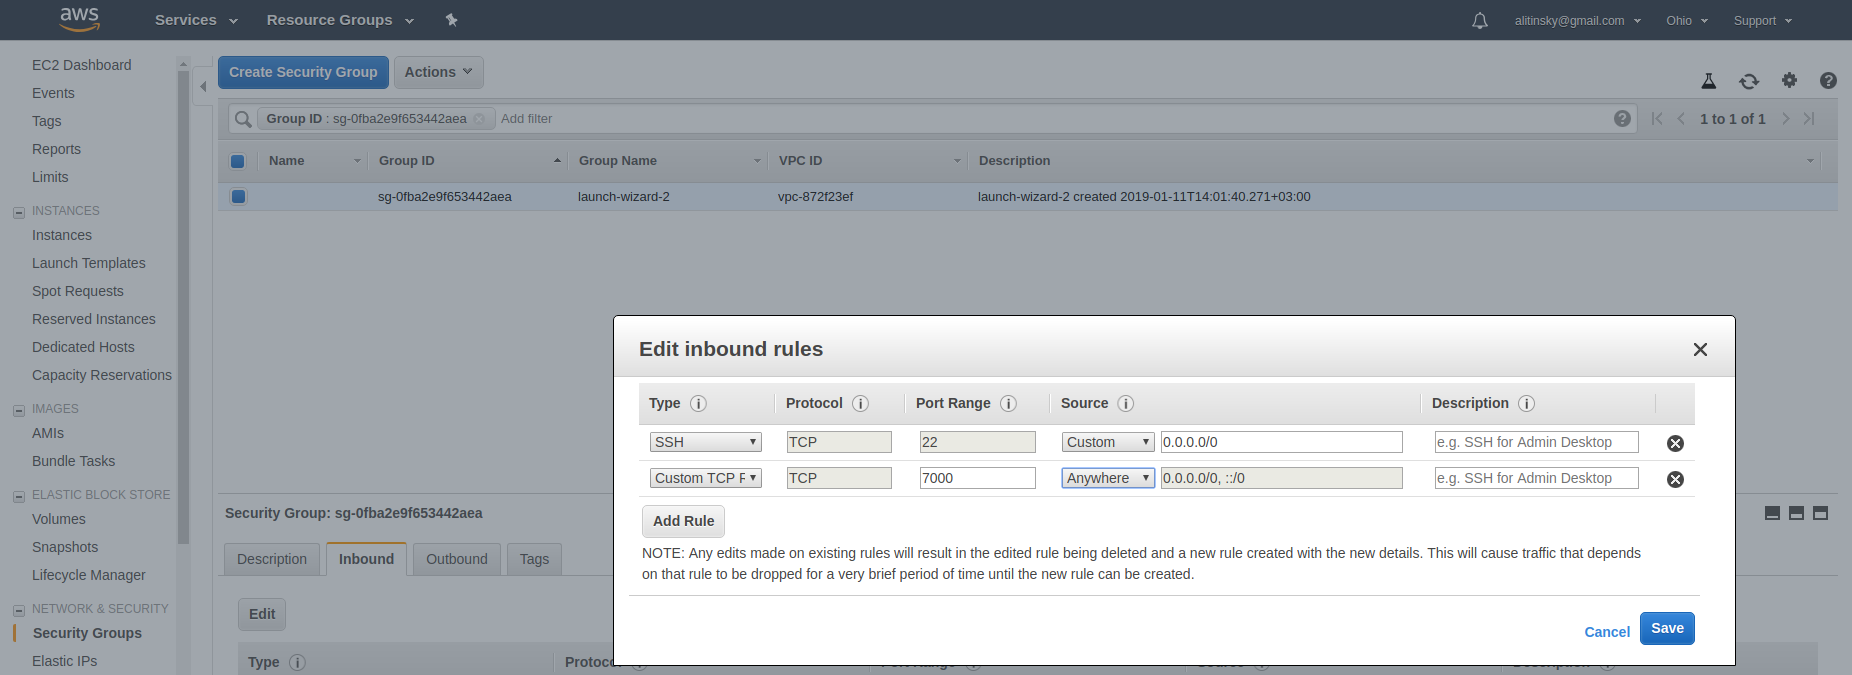
To make DeepPavlov ODQA model rest API accessible from Internet you should set corresponding inbound security rules:
8.1 Navigate to your instance security group dashboard (in this example security group has name “launch-wizard-2”).

8.2 Select “Inbound” rules tab, click “Edit”, then click “Add Rule”. For your new rule select “Custom TCP Rule” type, “Anywhere” source and input port for your ODQA API. Click “Save”.
Connecting to your instance by SSH:
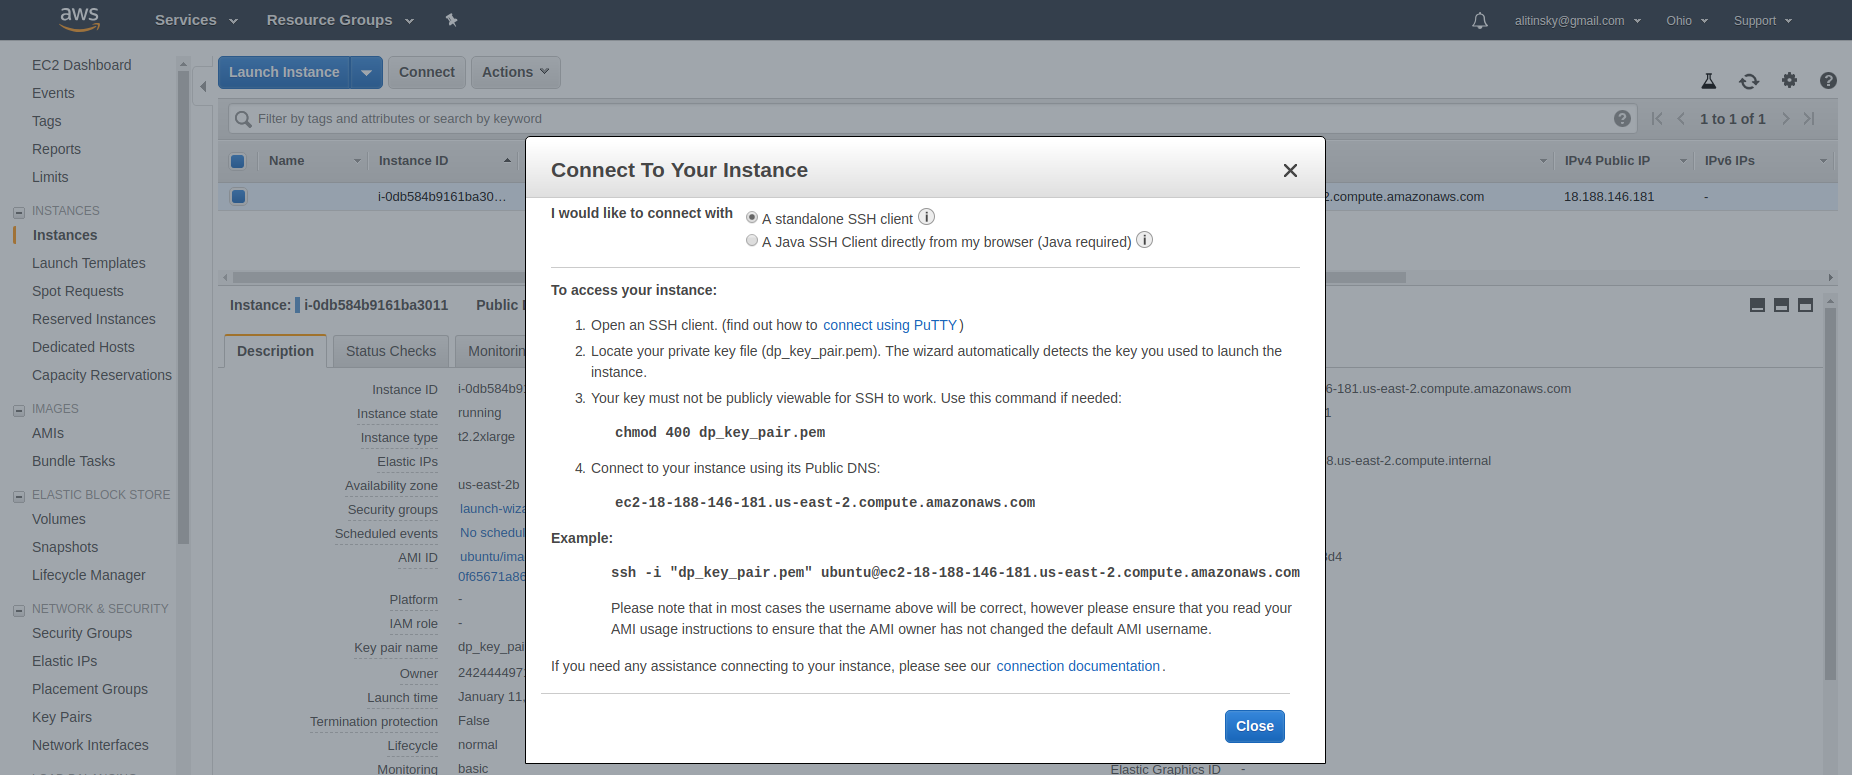
9.1 Navigate to your instance dashboard, right-click your instance, select “Connect”.

You will be redirected to connection instructions screen for your dashboard. Follow instructions for standalone SSH client. SSH connection bash command example will already contain valid user and host name. To connect to your Amazon instance just run the example with valid path to your saved key pair (instead of “dp_key_pair.pem” in this example).
2. DeepPavlov ODQA deployment
Login to your AWS EC2 instance.
For now DeepPavlov requires Python 3.6 to run. Below are instructions for DeepPavlov ODQA deployment under Ubuntu 18.04 (which has pre-installed Python 3.6) and virtualenv.
Install pip3:
sudo apt updatesudo apt install python3-pipInstall virtualenv:
sudo pip3 install virtualenvCreate and activate Python 3.6 virtual enviroment:
virtualenv env -p python3.6source env/bin/activateInstall DeepPavlov:
pip install deeppavlovInstall ODQA dependencies:
python -m deeppavlov install en_odqa_infer_wikiDownload ODQA models (it will take quite a time):
python -m deeppavlov download en_odqa_infer_wikiRun ODQA REST API service, where <port> is port you defined in TCP inbound rules for your AWS instance:
python -m deeppavlov riseapi en_odqa_infer_wiki -p <port>
3. Accessing your ODQA API
Get your AWS instance public DNS from the instance dashboard.
Get full info about your ODQA API from its Swagger by navigating to following URL in your browser:
http://<your_aws_instance_public_dns>:<your_odqa_service_port>